Best Rockhounding Backpacks: Fit, Load, Tool Safety
A rockhounding pack is a hiking load system first. Choose fit and realistic carried weight, then add protected tool/specimen organization.
Choose equipment from the material and job first—not from the retailer first.
What makes a good rockhounding backpack?
A good rockhounding backpack fits the user under dense loads, transfers weight comfortably and lets sharp tools and specimens be isolated from the pack fabric and body. Pack volume alone is a poor guide because rocks can reach an uncomfortable weight long before the bag is full.
Fit before features
A poorly fitting pack makes dense rock loads worse. Harness and hipbelt fit matter before pockets.
Isolate sharp tools
Carry pointed hammers in sheaths/holsters; do not let a steel point bear directly on pack fabric or your body.
Wrap specimens
Use pouches, paper, cloth or boxes to reduce chipping and protect the pack interior.
Know when to stop
Rock density can turn a small pack into an excessive load long before the volume is full.
Check the source, model and buying conditions.
Manufacturer pages and manuals support the specifications identified in a guide. Check the exact model and current instructions before purchase; similarly named variants can differ.
A product card’s check date applies to that record. The page revision date does not mean every product was rechecked. Confirm current price, seller, package contents and availability on Amazon.
These guides use published information and editorial selection criteria. Hands-on testing is not claimed unless a guide describes the actual test.
Shopping cards show products with a direct Amazon purchase link. This limits the displayed selection; it is not a comprehensive market comparison. Use the tool-class guidance and current manufacturer instructions to assess other options.
Editorial method: read the Gear Review Methodology & Evidence Policy. Affiliate relationships: read the disclosure.
Illustrated field-pack essentials available now
These photographed products are notebook, compass and headlamp accessories for packing a rockhounding field bag. They are not backpacks. A backpack-model photo has not been verified for this site, so we have not substituted an unrelated image.
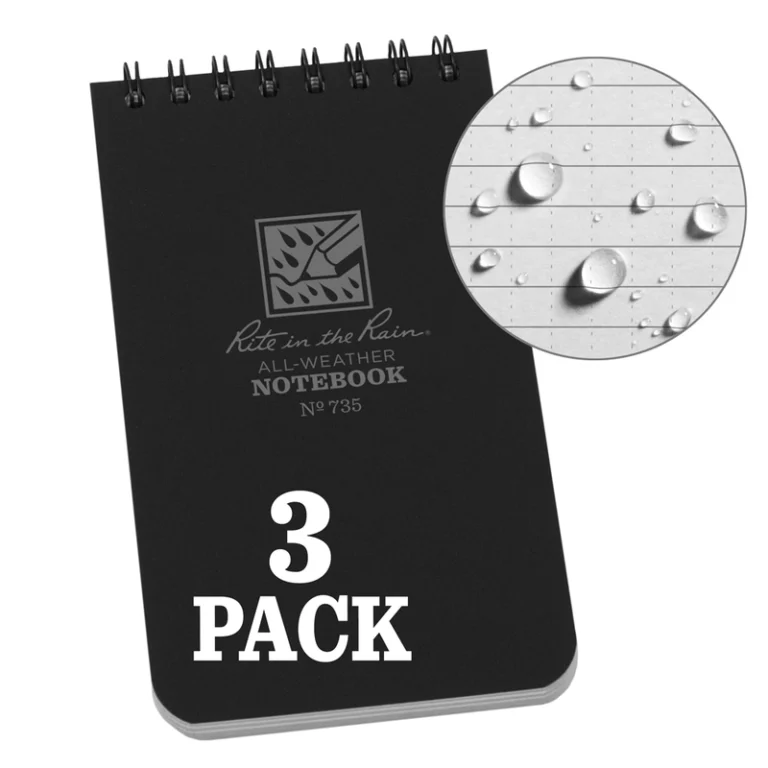
Rite in the Rain 735-3X Weatherproof Notebook 3 Pack
Best for: Recording GPS waypoints, specimen details and field observations in damp conditions.
Before buying: 3 x 5 inch top-spiral universal-pattern notebooks; use pencil or suitable all-weather pen when wet.

Brunton TruArc 3 Baseplate Compass
Best for: A non-electronic navigation backup and map-orientation aid on remote collecting trips.
Before buying: Learn local magnetic declination and carry a paper map; a compass cannot replace route planning.

Black Diamond Spot 400-R Rechargeable Headlamp
Best for: Rechargeable 400-lumen lighting for after-dark field notes, camp sorting and route finding.
Before buying: Confirm Spot 400-R rechargeable graphite version; some retailers mark older variants discontinued.
Affiliate disclosure: As an Amazon Associate, USA Rockhounding earns from qualifying purchases. Product listings, sellers, prices and availability may change; confirm the exact item on Amazon.
How to choose a rockhounding backpack for real collecting trips
A comfortable daypack is not automatically a safe specimen pack. Collecting changes the load during a hike: rocks are dense, often angular, and usually heavier on the return journey. Choose capacity by the water, layers, first-aid equipment and specimens you expect to carry, not by the largest advertised litre figure.
Match the pack to your field route
- Short roadside visit: A compact pack with durable fabric, water storage and a separate specimen pouch may be sufficient. Do not use a delicate hydration compartment to carry sharp samples.
- Long trail or hot-weather trip: Prioritize an adjustable hip belt, ventilated back support, secure water capacity and space for weather protection before adding specimen weight.
- Tool-heavy collecting: Keep the hammer and chisels in a proper sheath or rigid tool roll; sharp steel should never point into the back panel or a hydration bladder.
- Fragile specimens: Wrap each sample individually, record the locality where permitted, and keep vulnerable crystal faces out of contact with loose, hard stones.
Load and fit checks before buying
Try the pack with a realistic weighted load. The hip belt should transfer weight without restricting movement, shoulder straps should not concentrate pressure, and the loaded pack should remain balanced on a slope. Check stitching, abrasion points, zipper access, waterproofing provisions and whether the pack can be cleaned after dusty fieldwork. A rain cover limits splashes but does not replace waterproof inner bags.
Field safety: Establish a personal carry limit before collecting. Leave a specimen behind rather than compromising drinking water, balance or the ability to return safely. Compare tools in the field-tools guide and protect finished material with the specimen-storage guide.
Field backpack selection by collecting method
The pack that works for an easy family visit to a fee-dig site may be unsuitable for a rocky traverse, creek approach, or long hike over rough public land. Start by listing the trip’s non-negotiable supplies: drinking water, weather layers, navigation, communication, first aid, and any medication or personal equipment. Only then estimate space for sample bags and permitted tools. Specimen capacity is the leftover allowance, not the baseline around which everything else should be squeezed. Two collectors covering the same trail may need quite different setups if one is photographing outcrops and the other expects to carry back heavy hand samples.
Three realistic load patterns
For a short stop near a vehicle, choose fast access and easy cleaning over a large suspension system. A small pack can organize eye protection, notebook, gloves, water and a few labeled specimens. On a longer walk, an adjustable harness, breathable clothing interface, effective hip belt and stable pockets matter more. In a technical or isolated setting, carrying the right emergency supplies may leave surprisingly little room for rocks. Avoid treating a backpack’s maximum stated load as a comfortable load for your own body, terrain, weather and level of conditioning; comfort testing is essential.
Volume is not a substitute for weight planning
A roomy bag can tempt collectors to pick up too much. Rock weight increases rapidly because dense samples do not compress like clothing. Before leaving the car, decide what amount you can safely carry home without compromising footing or water supplies. Use a scale at home to learn what a few typical hand samples weigh. If your route includes steep descents, loose scree or creek crossings, set a lower specimen allowance. Keep the heaviest items near the back and relatively centered, but not in a way that creates pressure points against the spine.
Backpack materials, seams and failure points
Fabric durability depends on fibre, weave, coating and construction rather than a single marketing number. Nylon often provides good abrasion resistance for its weight; polyester can be serviceable in lighter duty designs. A high-denier fabric does not compensate for weak seams, poorly reinforced attachment points or thin pocket bottoms. Examine the stitching where shoulder straps meet the body, the lower corners that scrape against rock, and the seams of any external tool pockets. A reinforced base or removable washable liner is especially valuable when carrying wet gravel, grit-covered containers or angular matrix.
Inspect zippers and buckles while the pack is loaded, not just empty on a shop floor. Does the main zipper still run smoothly, and can you retrieve a first-aid kit without emptying everything? Exposed mesh side pockets are convenient for bottles, but sharp rock fragments or hammer handles can tear them. Elastic shock cords can restrain a jacket but should not be relied upon to hold a heavy pick. Webbing attachment loops are useful only when you can secure the tool against swinging. External loads should not catch brush or strike another person during a narrow trail passage.
Pack fitting and load-transfer test
Fit is a combined result of torso length, back-panel geometry, shoulder strap position and waist-belt location. An expensive pack in the wrong size can feel worse than a simpler model that fits well. Check that the belt rests comfortably around the hips, not on the abdomen, and that shoulder straps follow the shoulders without leaving large gaps. A chest strap can stabilize movement but should not restrict breathing. Adjustable load-lifter straps, if present, can help manage how weight sits; they do not correct an incorrect torso size. Try the bag with real supplies and representative sample weight.
Perform a short walking test that includes stairs, gentle bending and stepping over obstacles. Listen for metal tools tapping the frame or other loose items and note whether the pack shifts abruptly when you lean. If the load slides backward, reorganize or remove contents before blaming only the harness. Avoid training with so much weight that balance deteriorates. Most rockhounding outings do not justify expedition-size luggage. A field backpack should make travel safer and organization easier, not encourage ever-heavier collecting. If an injury, weather change or fatigue develops, reducing the load takes precedence over keeping collected material.
Protect your back and your samples with separate compartments
Tools should have their own secure arrangement. Put a geological hammer in a sturdy sheath or designated sleeve and wrap chisels so the sharp ends cannot penetrate fabric. Hard tools should not sit loose against a water reservoir, battery pack, phone or camera. A removable tool roll makes pre-trip inspection easier and reduces the chance of forgetting a chisel behind at the site. If the pack lacks a proper way to restrain a long-handled tool, do not improvise with a fragile side pocket. Carry it by another approved method or choose a different pack.
Pack specimens according to fragility and surface character. Tough, ordinary hand samples may tolerate individually wrapped bags; delicate crystal clusters need a rigid container and a support that prevents movement. Heavy pieces must not rest against fragile ones even if separated by a thin sheet of paper. Label each package as soon as legally collected, preferably with a field number tied to a notebook entry. Keep locality information private when appropriate. For soft or chemically reactive minerals, investigate appropriate conservation conditions rather than placing every unknown stone inside damp plastic indefinitely.
Protect cameras and field electronics
Dedicated padded sleeves can prevent a camera from striking stone samples, but ordinary laptop compartments are not intended to protect gear from a shifting rock. Put electronics in water-resistant inner bags and reserve a separate zone for wet or muddy equipment. If a satellite communicator or phone is the primary navigation backup, keep it accessible and charged. Do not bury essential items beneath specimens at the bottom of the pack. A small pouch for batteries, lens cloth, sample cards and pencil prevents the scattered-item problem that can turn a brief stop into a long search along an exposed trail.
Water and food storage in collecting terrain
Hydration is not optional weight. Estimate water needs for the weather, route, distance and personal circumstances using reliable local guidance, and plan for unexpected delays. Bottle pockets make it easier to see remaining supply; a hydration bladder can be convenient but must be protected from puncture by sharp tools. Check the drinking hose and closure before departure. Hot locations may also require sun protection and a backup source of fluids. Do not substitute speculative access to streams for known safe drinking water: seasonal drainages can be dry, contaminated, or inaccessible without crossing private land.
Keep food in a clean compartment away from specimen dust and dirty gloves. For collecting near mine waste, roadcuts or altered rock, avoid eating without cleaning hands first; mineral residues may include substances you should not ingest. On a full-day outing, pack a little reserve food and keep the most needed items close to the top. If the trip involves wildlife-sensitive areas, follow the local food-storage and waste requirements. The pack’s convenient layout should support those requirements, not encourage leaving wrappers or sampling debris behind. Always respect site-specific collection and public-land rules.
Rain, river crossings and cleaning
A manufacturer’s rain cover can deflect ordinary rainfall, but it does not make every seam, zipper or the lower part of the bag watertight. Use dry bags for essential gear in wet climates and consider what happens if the bag is placed on soaked ground. Sudden storms may make exposed ridges, gullies or washes dangerous; a waterproof compartment cannot make a hazardous route safe. Avoid crossing water that exceeds your skills or forecast tolerance merely to reach a promising locality. On return, remove grit from seams and let the empty backpack dry fully before storing it.
For dusty trips, shake out loose material outdoors without raising a cloud near your face, brush gently and use a cleaning method appropriate to the fabric and contamination. If any potentially hazardous mineral dust is involved, take more cautious precautions and avoid dispersing it through your house. Inspect the bottom, strain points and concealed pockets for broken fragments. Never put an unknown sharp specimen in the same compartment as soft protective equipment. Pack liners are easier to replace than torn seam tape or a damaged hydration reservoir.
Safety checklist for the final mile back
Late in the day, people often discover that specimens have made the return journey harder than the outward hike. Stop before fatigue impairs foot placement and rebalance the load. When descending loose talus, keep hands available for balance and avoid hanging heavy tools that move independently of the pack. If a storm, darkness, heat exhaustion or a trail closure changes the situation, abandon nonessential collected weight rather than risking injury. A headlamp is a backup, not an invitation to extend a difficult collecting trip past a safe return time.
How to evaluate a product listing
Read the actual loaded dimensions, torso-fit range, waist-belt design, materials and warranty rather than relying on a product photograph filled with lightweight camping clothes. Look for accurate views of the pack’s base, zippers, straps and pockets. Separate manufacturer specifications from customer impressions, and recognize that advertised volume says little about tolerance for sharp, dense stone. Review whether replacement buckles are obtainable. If a seller offers no meaningful fit or construction details, comparing its price to a more thoroughly documented model may be misleading.
Five buying scenarios
Family beginner: A moderate, easily cleaned pack with bottle storage and small labeled containers generally serves better than a complex expedition harness. Quartz crystal collector: Prioritize space for rigid specimen boxes and stable load distribution to prevent damage to protruding crystals. Stream-gravel researcher: Assess wet-gear separation, bucket or screen carrying arrangements and cleanup. Remote desert walker: Prioritize water, heat-management equipment and navigation reliability, leaving less capacity for stones. Lapidary rough collector: Prioritize specimen weight limits and safe workpiece handling rather than the number of zippered pockets.
Final decision: fit, permission and restraint
The best pack for rock collecting is the one you can wear comfortably while carrying necessary supplies and a modest, appropriately protected collection. Choose it by route conditions and collection type; keep tools separated; label samples; and resist filling every litre with rock. Field conditions and land-access permissions change, so check the relevant site before travel. The backpack purchase cannot resolve land ownership, archaeological protection, mining claims or whether specimen removal is lawful. For a companion equipment plan see the field tools collection and specimen storage options.